How to Add Documents & Photos to Entities
Account Administrators of a Cemify Account have the ability to enable a feature where you can attach documents or photos to an entire Entity. Some examples of Entities are Sections, Blocks or Lots depending on how your cemetery is set up. Please feel free to reach out to Cemify Support if you have questions about what is considered an Entity in your cemetery.
By default, you can add photos or documents to a specific grave space, but this feature enables you to attach photos or documents to an entire Entity.
Some examples of documents that could be added to an Entity:
- If you have a Lot Card associated with a particular lot, you can upload it to the Lot entity, rather than each individual grave space.
- If you have the original hand drawn maps for a Section or Block, these can be attached to the entity for quick reference.
- If you have photos of the entire Lot, you can attach it to the Lot, instead of attaching it to each grave space.
This Article Includes:
- Steps to Enable this Feature
- Steps on How to Add Photos or Documents Once the Feature has been Enabled
If you are interested in learning more about adding documents or photos to a specific grave space, please visit this article: Uploading Documents or Photos
Steps to Enable Document/Photo storage for Entities:
- Go to 'Account & system settings' from the top right menu:

- Go to 'Plots' under 'SYSTEM CONFIGURATION'

- Scroll to the bottom of the page & click the button to the left of 'Enable photos & documents on entities' to toggle on this feature. Depending on how your cemetery is set up, an Entity can be an entire Section, Block and Lot.

- Click the blue 'Save' button on the bottom right of the page. A green banner will appear at the top telling you the Plot Settings have been updated.
NOTE: If you do not press this button, the feature will not be enabled.

- Finally, go to the Plots page to confirm the feature has been enabled. To check, simple click on an Entity (for example, a Section, Block or Lot) from the Entity list of the left.
Without this feature, your view looks like this:

With this feature enabled, your view should now look like this.
Two tabs, 'Photos' & 'Documents', have been added to the right of 'Plots':

Steps to Add a Document or Photo Once the Feature has been Enabled:
- Go to the Plots Page.
- Select an Entity (for example, Section, Block or Lot) from the Entity List on the left that you want to add a photo or document to.
- Select either the Photos or Documents tab for that Entity.
Note: if you do not see these tabs, either the feature has
not been enabled or you are not in an Entity.

- After you are in the relevant tab, click the 'Choose Files' button to upload your file:

TIP: You can also Drag & Drop files into this area to upload them,
instead of having to press the 'Choose Files' button & manually selecting files.
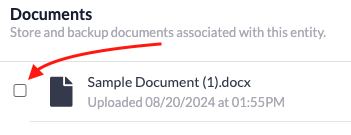
- After the file has been successfully uploaded, you will see it listed under the relevant tab:

- If you click the three dots (ellipses) button that allows you to, 'Edit title', 'Reorder' or 'Delete' each file that is listed.

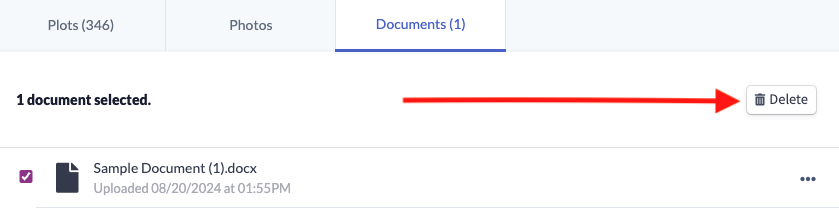
- To delete multiple files (for example, if they were all added to the incorrect Entity) simple click the box to the left of each file & then click the delete button to delete all selected files:
If you have any issues or need further assistance please do
not hesitate to reach out to us as support@cemify.com. We are here to help!!